Friday 15 April 2011

FINAL SEQUENCE

Final Video
Drake animation: 46 seconds
Total video length: 1 minute


Actions

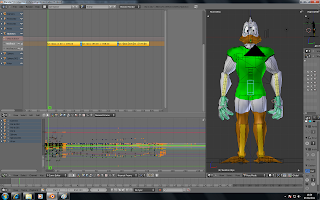
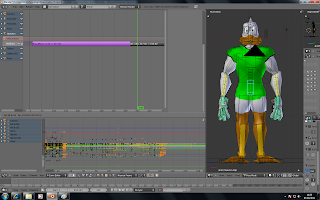
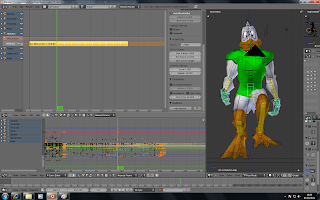
The list of Action sequences I created

Poses:
  • NORMAL
  • Game_pose
Camera:
  • Camera_Final
  • Camera_Drive
  • Camera_fly_around
  • Camera_Demo
  • Cam_Idle_Ideas_Walk

Animations:
  • Idle
  • Ideas
  • Walk
  • Demo
  • Drive
  • Final
Face Contraints:
  • Snarl
  • Angry_Eyes
  • Smile_Frown_Lips
  • Smile_Fronw_Eyes
Other:
  • Hand Curl
  • Colour Change

Monday 11 April 2011

Reference videos

Sonic idle animation
http://www.youtube.com/watch?v=CDo06jnDPyc

Idle alien

Some idle videos I looked at, but got most tips from the tutorials I was watching and my own imagination is how I developed my final animations. It is also very useful to watch people and to think about what you would do in those situations such as standing around or starting a car and also look at how you move your hands and body. Subtle animation is very important for good animation but so are over the top movements.

GT PSP Trailer
Modnation Trailer

Mario Kart Trailer

I drew lots of inspiration from this trailer (MK), but for mine it was key that the introduction of the character was more important than the game itself.

Sunday 10 April 2011

My game trailer


A short spoof teaser trailer to show the idea of the game I imagine my character to be in.
Just to give some context with a relevant animation of Drake.
He gets in to an invisible go kart and starts it up, made use of music and sound effects to improve the viewing experience. Gives you more of a feel of the character and his cool and cheeky nature. Reminded me of Crash Bandicoot a bit, which is the type of character I was going for really.

Saturday 9 April 2011

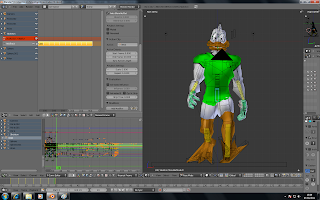
Skeleton

Details:

Rig name (Armature) = Skeleton

All objects, bones, pose actions, camera actions and constraints are named appropriately.
Any un-named actions should be ignored and have no key frames.


  • Rig created by me following rigging tutorial by David Ward
  • Finger controllers can be scaled and rotated to bend finger using the hand constraints (actions).
  • Lip and Eye constraints/controllers can be moved together or separately up down left and right to move lips and eyes around in order to pull different facial expressions.
  • Move and rotate foot and leg using the IK_Foot bone.
  • Move and rotate hand and arm using the IK_Hand bone.
  • Look at bone is used to move eyes, eyes and mesh around the eyes follow the look at bone.
  • The is an Action named "NORMAL" which is keyed to the standard stance so it is possible to always return to it.
In week three is when we first discussed about rigging (making a skeleton), we were told it was fine to use the pre-loaded bi-ped that is already in 3D max, but I chose to create my own, because I wanted to learn every stage of 3D character modelling and I could plan and design how my character would mover properly. The most important thing about making a skeleton is the parenting, which was discussed in the third week lecture and was apparent in the tutorials I followed, this is so when you move a hand for example to a new location the arm will follow and the head will move with the body and things like that, it makes the animation a lot easier and helps make movements look more realistic.
IK and controller bones are useful so you can move things in different ways, for example with the foot, you can lift the foot and the whole leg, or just tap the foot at the back or the front.

Image and Audio References


Summary

Computer Science
Computer Gaming and Animation Technology
3D Character Animation Blog EJ315001S
Semester 2 Year 3

Drake Duck
By Henry Harling 0804212

This is a blog to represent the design, development and creation process of my character, and to demonstrate and reflect on him.

The blog is in order of date posted not chronological order with newest posts at the top and oldest at the bottom.

The way I have worked is by following tutorials while making notes and developing my character and taking what I have learnt a step further and based my creation on the brief in the module guide and from teacher. I have added to the blog when I can and have written up all of my key notes again on the blog. Through out the development process I took print screen to supplement my notes, I have also worked on sketches and concepts to help the creative process. My character has developed through out it's creation but I pretty much stuck to my original basic idea.
Even though it was recommended to draw the character to scale first and then model it around the drawing I decided I would develop it free hand based on my sketches because a 3D model will always look a bit different to a 2D drawing and I would rather it looked like a cool 3D model that was similar to my sketches rather than a lower quality 3D model that looked exactly like my drawing.
I have made a few animation and videos to show some of what my character is capable of, including one that is a trailer for the game I've imagined him for.

Conclusion/Evaluation

I have made a few demonstration videos now and am very happy with how everything has turned out and come together. I may need to make a proper final animation still, but I am waiting to find that out at the moment.
I think I may have spent to long just doing modelling really as this is meant to be a module more focused on animation and character design, but I do really like the way he looks and moves and I have managed to achieve my aims and my character does embody my original ideas and attributes. I am also pleased with my final game idea and think it is appropriate for the target audience and think my character would fit in well with that type of game.
The way I designed the character did make it a bit tricky to animate him at times so next time I model a character I will take that in to consideration.
I also need to take time management into much more consideration which I usually comment on at the end of my assignments, because I have focused all of my time and effort on this assignment I have hardly any time left to work on my others. I also did most of the work for this assignment itself in the last couple of weeks rather than spreading it out evenly through out the term, I did do bits and pieces all along, but not enough.
I have become a much more proficient modeler and animator while doing this assignment, and have learnt nearly everything from David Ward's tutorial so I would advise others to watch them. Other knowledge I learnt last year from doing extra modelling outside of the assignment brief such as weight painting came in handy this year.
I think I have managed to create a believable character that Disney might put in a new game and that was the main aim of this project really. He fits in well to the Disney world but also has his uniqueness and charm. My friends and family have made quite a few comments on how much they like the character and have given me some helpful criticism along the way which has kept me motivated and helps me believe in the quality of my character.
I have struggled with many problems along the way and have managed to over come most of them, some in particular that I never really resolved properly were noticing some areas were not weight painted properly so did not move how I would like them to, but I can't seem to weight paint them anymore. Another is the area around the eyes and there constraints not working perfectly sometimes and I managed to improve them but not resolve the issue completely. Lastly when trying to animate/render my drive animation, I kept getting an error message, so in the end just using a different format for the video worked, but I would have preferred not to do that.
I thought about giving him extra objects such as sunglasses, a hat or headphones, maybe even a guitar, all of which I had modeled before, maybe a go kart or road for the animation, but I thought just using the character the module is about would keep the videos more pure and keep focus on the character.
I think my character and game were appropriate for the 4-14 age range given in the brief which also in my opinion is slightly older than the target of Disney games.
Overall I have thoroughly enjoyed this module and will definitely do more character animation in the future with this character or another. Hopefully one day I will be able to use what I have learnt at some point in a future job.

Editing videos

Windows movie maker


Added some nice music, sound effects, text and transitions to supplement my videos.
Creation 16


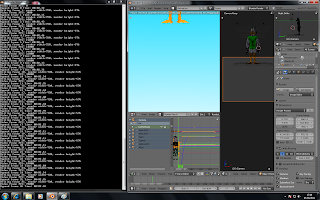
This is where I really realised my weight painting was still not perfect, when moving my character some vertices would not move at all, and no matter what I tried I could not find away to weight paint the mesh again, it just wouldn't let me. So to get around the problem for the tail when he was walking, earlier was to go into edit mode and delete the vertice that was not moving and extrude and attach the ones that were, that worked perfectly. But this time I could not find the vertice that was not moving and did not no what bone it should be attached to, to get around this I used a camera trick.... I moved the camera around to the left as he gets in to the invisible car so you can not see the part not working properly, it looks like a good appropriate camera movement anyway so was a good way of getting around it. I used camera tricks to look like he was moving as well, because this is much easier than moving the model, so when he is driving around and turning the corner, it is really just the camera flying around, although when he drifts I did animate the model a bit too, especially his arms and eyes.

Creation 15

NLA editor and rendering


Notes:
  • In order to loop animation.
  • Open NLA editor.
  • Click on frost icon from skeleton walk cycle.
  • From = add track.
  • N properties.
  • Ctrl + up arrow = maximize window.
  • Drag out the the new walk cycle track to repeat the animation.
  • Shows white lines where it repeats (this is a new feature to 2.56).
  • Break end frame down by 1 frame so 30 to 29.
  • Add > Action strip.
  • Idle, so now can have two animation actions in a row.
  • Idle to walk.
  • Add > Transition (select two action scripts with a small gap between them) this automatically animates a transition between animations.
  • When you are happy with your animation set, RENDER!
  • Render by choosing destination folder and render type, the click ANIMATE!

Creation 14

Animating a walk cycle and a idle animation


Idle Notes:
  • Open up animation view again, set to 30 fps (frames per second).
  • New action (idle).
  • Frame 1 - Relaxed/Simple/Idle.
  • Frame 30 - Look, 50 - Look other way, 65 - Start to reach up, 80 - Reach up, 90 - Touch face, 105 115 125 - Scratch face, 135 -Move hand away with a pause, 165 - Bring back down, 180 - Back to start pose.
  • Duplicate or move key frames or move bones slightly to make snappier movements when you watch the animation (choose distance between key frames carefully).
  • Always test/check your animation in the main window to see how it looks, keep an eye on the frame rate though it might be different to how you wish the animation to be rendered in my case 30fps often was only displayed as 19fps so I knew actual animation would be a bit faster than the demo.
Walk Cycle Notes:
  • Animate a walk cycle in stages of 5 (5 frames apart).
  • Do in four stages, then duplicate in reverse those stages for the next 3 stages of key frames ending in the same start position, now you can loop the animation and you have a walk cycle.

Creation 13

Mask Modifier


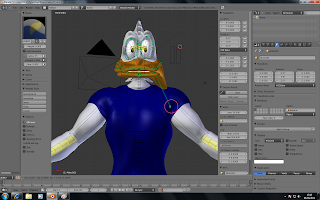
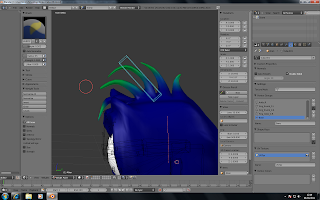
This is where I followed the mask modifier tutorial, to remove the mesh under the t-shirt so it would not come through the shirt. I also added a bone for the hair.
It took me a while to get the mask modifier right to remove as much mesh a possible without being able to tell, it took a lot of tries to get it spot on.

Notes:
  • Main mesh edit mode.
  • Select all vertices under the clothing.
  • Make sure to have some fall of, in other words one line of vertices before the one you first think you should remove, because it deletes the mesh right up to that set of vertices.
  • Turn your selection into it's own vertex group by going into the object data menu and pressing the plus/add button which adds new vertex group.
  • Name it clothes, and assign.
  • Go back to object mode now.
  • Go to modifiers, choose mask and then choose vertex group clothes, it will remove all vertices except for the ones in the clothes group, so tick the inverse box.
  • At this point I had to go through a weight painting process for the t-shirt because I had not done so yet, this took a lot of trial and error to figure out the best way of doing this.
  • I also tried to give the hand one overall hand controller like the face but it didn't work very well and was not really necessary either.
  • The way I had designed my model looked good but was tricky when animating because the lats and the biceps would overlap and look poor in renders, lats should be effected when you lift an arm up but you don't want them to indent when you put the arm down, took a while to figure out the best way to weight paint that area.
  • I also found out at this late stage that there is juts an option for each bone to turn deform off, this would have saved me a lot of weight painting.

Creation 12

Action constraints


Notes:
  • Attach finger controller by
  • Select start fing, shift select fing controller, Ctrl + Shift + C
  • Add constraint, copy location and rotation (pose mode).
  • Alt + P = un-parent.
  • Now select controller then shift select and add constraint, action.
  • I had quite a few problems getting my constraints to work properly, you need to find what numbers in the action work best for you so just experiment, you might also need to change you action constraints key frame positions slightly. So i played around with the weight painting more for the fingers and face and the positioning in the action constraints. Remember to reset/clear locations and rotations before you try doing the action constraints as well.
  • For the action enter; Action: Hand_Curl Action - Length Start: 1 End: 2 Scale Y - so fingers are effected when you scale controller on y-axis Target Range - Min: 1 Max: 0.5 Change to local space as well.
  • Do this for all fingers
  • Now do it all again for the extreme pose; Start: 3 End:4 Min: 1 Max: 1.5
  • Now you can control your fingers more easily just using the controllers, this is the purpose of action constraints to make your model/rig more easy to manipulate.
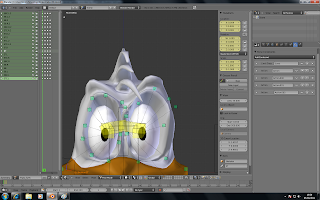
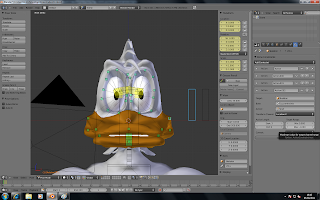
  • Now do the same for the mouth, I also took the tutorial a step further and did it for the eyes as well as adding more constraints to the mouth and eyes when moving the controller in different directions, the result is 1 controller bone for the eyes and 1 for the mouth which you can move together or separately which you can move left, right, down and up to effect the face.
  • In order to get the mouth and eyes to work properly I had to go back and switch the direction of some of the bones and parent them properly, it turned out after much investigation I had not followed the earlier tutorial (face rig) properly and it was rigged incorrectly. Alt + F = switch direction.
How I did the lip constraints:
  • Add bone: Smile_Frown
  • Frame 1 grab all lip controllers, I = Insert key frame - LocRotScale - New action: Smile_Frown
  • Frame 2 - Smile pose.
  • Frame 3 - Normal pose.
  • Frame 4 - From/Sad.
  • Select new bone add constraint to lip bones
  • Action 1; Start 1 End 2 Smile_Frown Min 0 Max 1 Location Y Local space
  • Action 2; Start 3 End 4 Min 0 Max -1

Notes