This week our lecture was a brief overview of character animation. We learnt about good modelling techniques in order to have a character that is practical to rig, this included things like having more circles of vertices at areas that need to crease more such as joint like a shoulder or an elbow, it was also recommended to use armor to cover up such areas so you don't need to worry about your model creasing badly. It helps to have big joints as well.
It was recommended to use reference sketches that are to scale to help you model your character.
You need to consider how you will model your hands, use glove hand modelling if you do not plan to move individual finger much, in my case I think I probably will like to have some proper fingers for my character.
Consider the mesh geometry so when you com to moving areas like the face, you will be able to create goo expressions.
We talked about offset movement, anticipation, weight transfer, exaggeration and different types of movement, such as vertical and projectiles (all of which I have already studied in my 2D animation module), these are all things I need to consider when modelling and animating my character.
The lecture also discussed camera angles, which can give you different perspectives and some types are ideal for certain types of scenes. A camera can be very useful when making an animation.
Bouncy ball
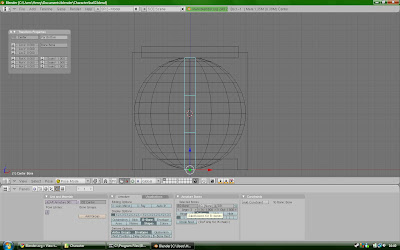
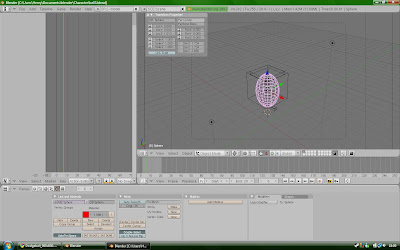
Tutorial I followed for this : http://www.blendercookie.com/2010/09/29/creating-a-bouncing-ball-rig/ Notes:
- N = Properties panel.
- Name bones.
- Parent sphere to centre bone.
- Everything in Oject mode, except centre bone (Pose mode)
- Add constraint to centre bone. OB: Top. BO: Bottom.
No comments:
Post a Comment