- Box edit mode.
- Subdivide (3 cuts).
- Delete half the cube, use the Mirror modifier, so character is symetrical and to save a lot of time. (Turn on clipping).
- Shift + S = Snap to.
- Ctrl + R = Add Loop.
- W = Specials menu - Remove doubles (can be very useful).
- Be VERY careful of keyboard short cuts because some can be hit accidently and really effect your model in an undesired way.
- Alt + Left Click = Loop select.
- B = Box select.
- C = Circle select.
- Ctrl + L = Selects all vertices of piece (linked faces).
- To close gaps, Alt + M = Merge vertices, can be used to attach fingers, like sewing.
- Shift + D = Duplicate.
- F = New face (always select four vertices, to make sqaure face!
- (edit mode, select all) Ctrl + N = Recalculate faces. Be careful can make model worse instead of better.
- Always make multiple saves incase you need to go back to an older verison because you can't recover current and you don't want to start all over again.
- Save often.
- If vertices that you don't want to attach, are, you can always turn off clipping temporarily.
- Ctrl + Num = Reverse camera angle.


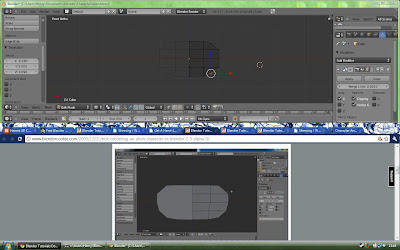
I began with just a cube, which I extruded scaled and manipulated into a head shape, I added spheres for eyes. I extruded inwards to create space for the eyes. It is important when creating a mesh to work with squares, not triangles or anything else, so each vertice should really only have four edges coming off of it. I have made notes by hand on paper all along the way while watching tutorials and creating my character to help the learning process so I can look back to them and maybe help others. Through out the whole process of creating my character I have used David Ward's video tutorials which can be found on blendercookie.com to help teach me and help me, they are very useful and easy to understand videos, he is a great teacher, I have followed them through in chronological order. Unfortunately some of the videos were based on the 2.4 version of blender but that's ok because I have that version and 2.56(beta) and it is possible to switch between them when you need to. Theser tutorials are great if you have experience in blender but are new to character modelling, he shows you how to model, rig, constrain and animate. The only thing he didn't really show was how to weight paint, fortunatly I already had a bit of experience with this and was able to figure out what I needed to do, I had to do an awful lot of weight painting indeed because using automatic weights did not work well for my character like it did for his, I think because mine was a more complicated and less perfect mesh, an important thing to consider in the future. Tutorials: http://www.blendercookie.com/category/david-ward/page/6/
No comments:
Post a Comment